

How to apply Builder Gel?
Builder gel is the newest trend in nails and quickly taking over the previous nail technology such as acrylic, dipping (SNS) and polygel.
What is builder gel?
Builder gel is a nail enhancement technology that is odourless, strong and can be used on natural nails for strength or can be used with tips or forms to create long nails. Builder is also known as soft gel because it is 100% soak off.
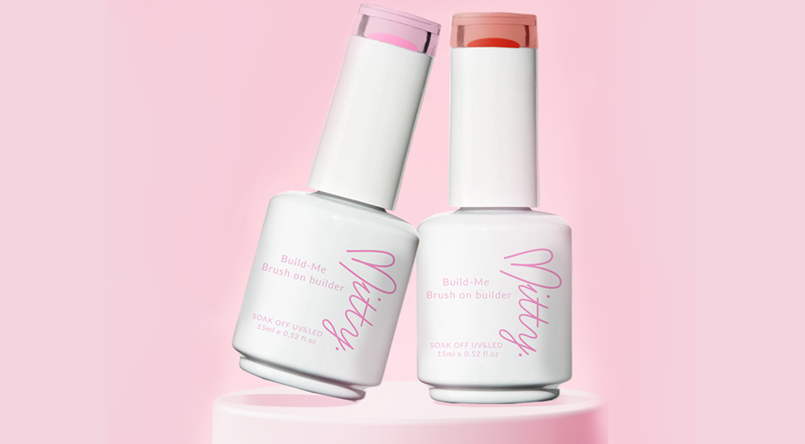
Builder gel can come in a jar or can come in a bottle which is also called brush on builder gel or builder gel in a bottle.
A builder gel, like Mitty brush on builder gel, is a completely different system to gel polish with different formula. With builder gel you can add strength to natural nails or build nail extensions or overlays. You can't do this with gel polish. However similar to gel polish, builder gel is 100% soak off in pure acetone.

What is builder gel used for?
Builder gel is used for in two ways. You can use it on natural nails or build nail extension using builder gel.
On Natural nails:
To create nail extension:

Why use builder gel?
This is a really valid question. It is important to understand the advantages of builder gel vs other older nail technology.
Quick application and removal
A good quality builder gel like Mitty brush on builder gel is designed so that it keeps it shape which means it reduces the application time. Plus it needs minimal filing. This means you will have a fabulous nails a lot faster than other applications.
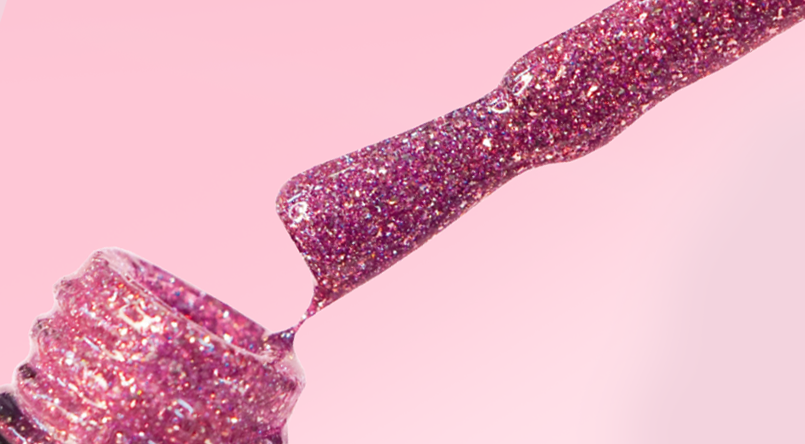
Builder gel is also 100% soak off in pure acetone very similar to how you would remove gel polish.
Feels like your own nails with polish on
Builder gel formula, when compared to acrylic and dipping (SNS) has a lighter more flexible feel on the nail and feels no heavier than a gel polish manicure.
Stronger
Builder gel is designed to be super strong. It can be used to create an extension over a nail tip or you can use nail form and to add strength to the natural nail. You can also use on natural nails without nail tips.
It can also be used instead of regular gel polish base coat to create a long-wearing, durable and strong foundation base if you experience nail breaks or you are looking to grow your natural nails.
Thanks to its strong and durable formulation
Mitty Brush on Builder gel can be applied thinner than conventional builder gels giving the nail a sleek profile and look.
And more:
What products do you need to apply builder gel
You use builder gel and to avoid your nails from lifting and peeling off, you need a few stable products such as:
At Mitty, we have a starter kit to help you get all the key products that you need.
How long does builder gel last?
If applied correctly and depending on your life style, they can last up to 3-5 weeks. There are some scenarios were they may last less which they can be:
Picture below shows a builder gel manicure that was done 4 weeks ago. There is no lifting or peeling, the nails have just grown out and need to be refilled.

How to apply builder gel on natural nails?
1. Clean your hands using sanitizing spray or gel. Manicure your nails by gently pushing back your cuticles.
2. File the surface of your nails with a 180/180 nail file. Clean and dehydrate the nail plate using an alcohol wipe.
3. Use Mitty PH Bonder to the nail plate. Only apply it to the natural nail. Use sparingly and don’t touch the skin with it.
4. Apply Mitty Gel Primer to the nail.
5. Brush on a thin layer of the Mitty Builder Gel and cure or 60 seconds in Mitty 54W LED nail lamp. Do not wipe this layer.
6. Apply a thicker layer and spread it with the brush side to side. Make sure you stay away from your cuticles. It is best to aim for a level layer specially in your free edge (part of your nails that extends passed your cuticles). You can turn your finger upside down to help the builder gel move to create a natural curve on the top of your nails.
Tip: It is a great idea to flash cure each finger for 10 second with a small LED lamp like Mitty 6W mini LED lamp. This way the builder gel will stay in place whilst you are working on other fingers.
Once all 5 fingers are done, cure your hand for 60 second.
7. Assess the shape and thickness of your nails. You can add a third layer if you like to have thicker nails or if you see uneven areas. Remember to not wipe the nail between layers.
8. If you are ready to shape the nail you can now clean the tacky layer with alcohol.
9. Refine and buff your nails into shape using a 180 grit nail file. We want to reduce any excess product around your cuticle area and the free edge to create an even natural looking nails.
10. Once filed and you are happy with the shape remove the dust filings with a nail brush and apply your top coat.
How to create nail extension using builder gel?
There are two methods to create nail extensions using builder gel.
The traditional method is using half cover tips. In this method, the steps are very similar to applying builder gel on natural nails. The only different is that after you have clean and dehydrated your nails (step 2 above), you apply the half cover tip on using a good quality nail glue and then you will add pH bonder and gel primer and continue.
Here is a video showing you how to apply create long nails using half cover tip and builder gel:
But there is a better way:
The nail technology has come a long way and there is a much faster and easier way to create nail extensions using builder gel and full cover nail tips.
This method, uses already shaped nail tips that cover your whole nails therefore there is no shaping of nail required.Period! The plus is that this nail extension is just as strong and lasts just as long as other methods.
How to create nail extension using full cover tip:
Watch video below showing how to create nail extension using full cover nail tips.
The full cover nail tips come in different shapes and length therefore reducing the time even further.
How to remove builder gel?
As discussed, a gel nail extension is 100% soak off in pure acetone. However there are a few steps to do so that you can easily remove them.
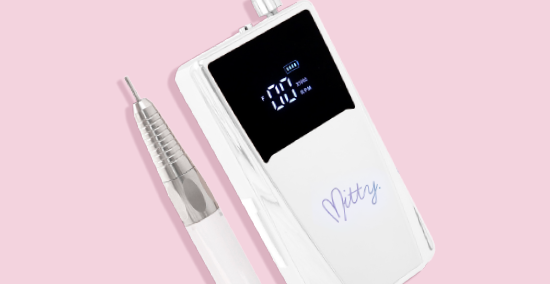
- File as much of the nail extension as you can using a low grit nail file like Mitty 100/100 grit nail file. This step can be much easier if an e-drill (e-file) like Mitty portable nail drill and using Smooth Top Barrel-Medium nail drill bit if you are trained on how to use an e-drill.
Watch video below showing how to remove nail extensions.
Where to buy builder gel remover kit?
You can purchase builder gel remover kit from our website directly.
Interested in learning more? check out our nail courses and nail trainings. We offer both online and face to face training. (Australia only). Click HERE to find out more


I need help I have used the.mitty builder gel on my nail and then I applied mitty black so I can do cateyes and it peels off what am I doing wrong
Leave a comment